Introduction – iPhone to Your Mac Without Using AirDrop
Your shiny iPhone 15 Pro shoots 4-K/60 ProRes, Cinematic Mode Dolby Vision, and now Apple’s hinting at 8-K 30 fps for the 2026 model. Sweet for picture quality, brutal for storage. A single 10-minute ProRes 422 HQ clip devours roughly 40 GB—more bytes than the entire original Toy Story movie.
When you try to punt that beast onto your Mac via AirDrop, two things happen:
“Waiting…” spins so long you start contemplating your life choices.
Bluetooth or Wi-Fi hiccups mid-transfer, leaving a ghost file that eats disk space yet can’t open.
AirDrop is awesome for memes and portrait photos. For multi-gig videography? It’s the wrong tool. This guide shows 10+ ways to shift Titanic-sized MOVs to your Mac without recompression, without corruption, and without gray hairs. We’ll compare wired vs. wireless, local vs. cloud, free vs. paid, and sprinkle real speed numbers so you can pick the fastest lane for your workflow.
Ready? Let’s prep your gear first.
Pre-Transfer Checklist – 4 Little Tasks That Prevent Big Headaches
1. Stay Current
Apple quietly fixes transfer bugs in dot releases. iOS 17.4 killed a nasty USB glitch where cables would time-out after ~20 GB. macOS Sonoma 14.5 patched Finder importing 10-bit HDR. Do the Settings → General → Software Update dance first.
2. Give Both Devices Breathing Room
If your Mac’s drive is 95 % full, the file-system journal runs out of scratch space mid-copy—hello corruption. Keep at least 20 % free on both devices before you attempt >10 GB files.
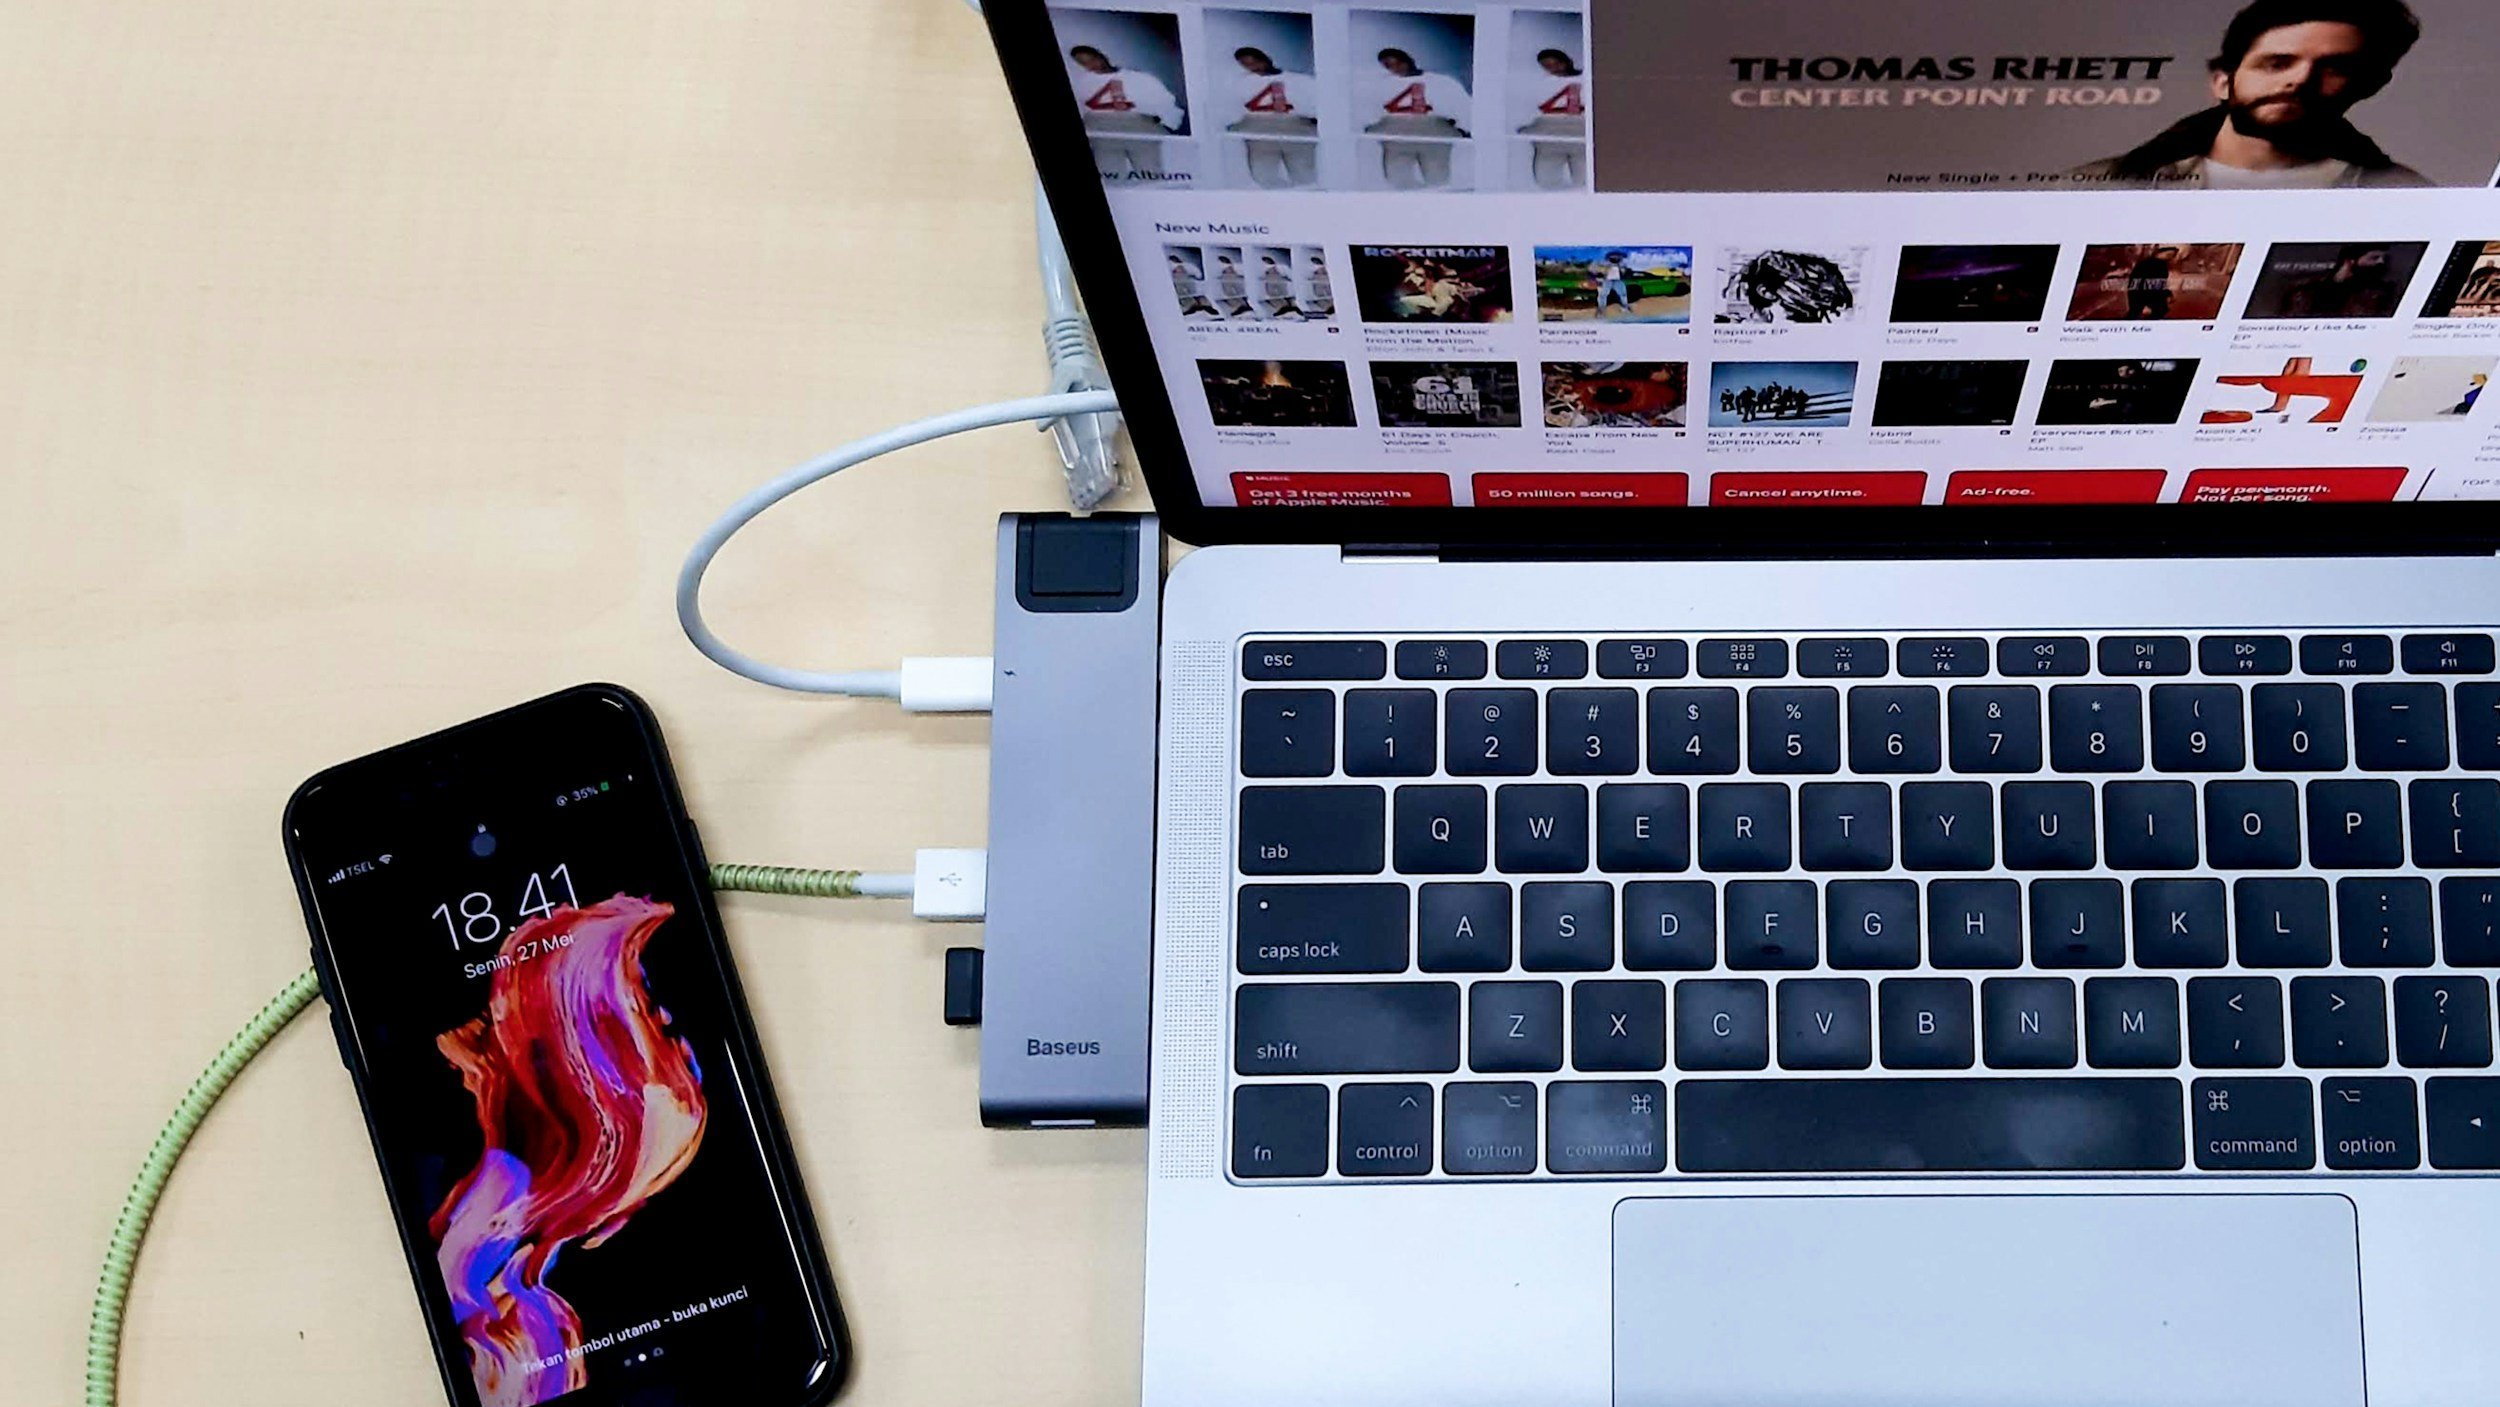
3. Inspect the Cable (Seriously)
The Lightning connector’s tiny pins wear out. One oxidized pad = “device disconnected.” Use an MFi-certified cable or Apple’s 60 W USB-C. Bonus: modern iPhones (15 series) finally speak USB 3 10 Gbps—only if you plug a spec-proper cable.
4. Toggle iCloud Photos Settings
If you shoot HEVC HDR and keep “Optimize iPhone Storage,” the full-res might live in the cloud. Toggle Download and Keep Originals before you plug the cable. Otherwise, you’ll copy a 720 p proxy and rage-quit later.
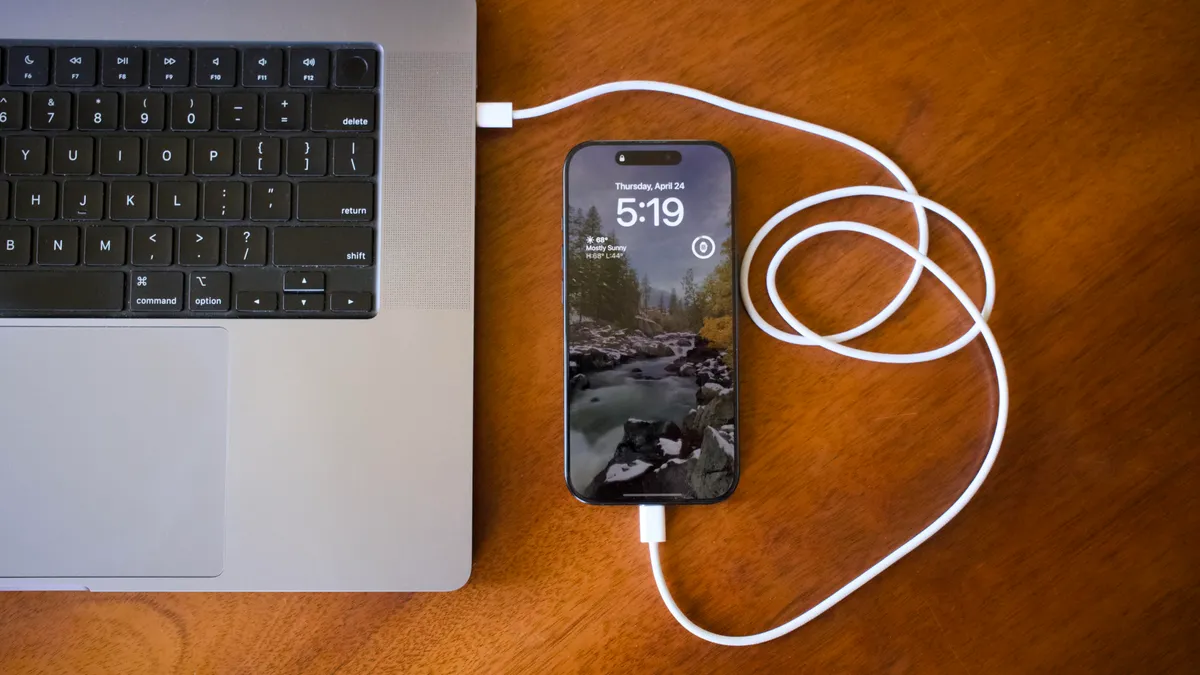
Method #1 – Image Capture Over USB: macOS’s Best-Kept Secret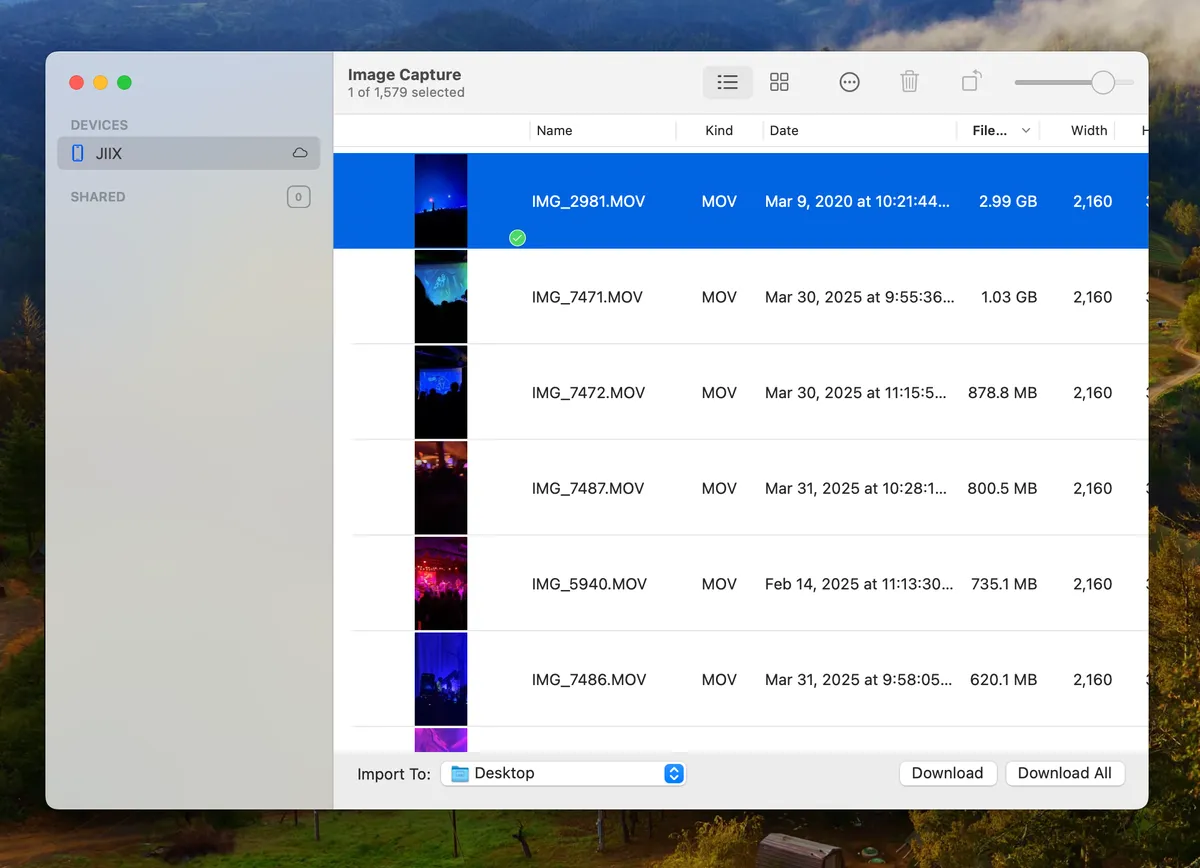
Why It Rocks
Image Capture uses the PTP (Picture Transfer Protocol), bypassing AirDrop’s flaky Wi-Fi dance. With USB 3 iPhones it’ll saturate ~900 MB/s—fast enough to shift a 40 GB ProRes file in ~45 seconds.
Step-by-Step
Plug the Cable – USB-C to USB-C for iPhone 15 series; Lightning to USB-C with Apple’s 3-foot cable for older models.
Trust & Unlock – When the “Trust This Computer?” pops, tap Trust and type your pass-code.
Open Image Capture – Find it via Spotlight. Click your iPhone under “Devices.”
Sort by Size – Click the little Size column to float your heaviest videos.
Choose Destination – Bottom pane: set export folder (preferably an SSD volume).
Import – Hit Import All or cherry-pick. You’ll watch speeds that AirDrop can only dream of.
Troubleshooting
Device Timed Out – macOS power-saving killed the port. Uncheck “Put hard disks to sleep…” in System Settings → Energy Saver.
Stuck at 0 B/s – Change USB port; some front-panel hubs on older iMacs throttle to USB 2.
Duplicate Clips – Image Capture shows bursts as separate still frames; deselect them.
Pros & Cons
| Pros | Cons |
|---|---|
| Fastest local (if USB 3) | You’re tethered to a cable |
| Lossless—no re-encode | Older Lightning phones 30 MB/s max |
| Skips Photos library bloat | Needs Mac (won’t help on PC) |
Method #2 – Finder File Sharing (Catalina +)
Since macOS Catalina, Finder treats an iPhone like an external drive. For casual YouTubers, this is the Goldilocks balance between speed and brain-dead simplicity.
Connect cable.
Finder sidebar → [Your Name]’s iPhone → hit Trust on phone.
Click Files tab. Apps like LumaFusion or CapCut expose their project folders here.
Drag → Drop to a local SSD.
Got ProRes clips saved to Photos? They hide in Internal Storage → DCIM > 100APPLE. Use the Photos tab or Image Capture for those.
Prevent Finder Hang-Ups
macOS crawls large HEVCs to build previews; disable Quick Look: Finder → View Menu → uncheck Show Preview. You’ll gain ~20 % speed on huge folders.
More Read
Method #3 – Direct-to-SSD With Files App (Fast, Portable, No Mac Needed Yet)
Gear Checklist
iPhone running iOS 16+ (Files app matured).
USB-C NVMe SSD (Samsung T9, SanDisk Extreme, Crucial X9) or old SATA if you’re penny-pinching.
If Lightning: Lightning to USB-3 Camera Adapter (gives power pass-through).
Format drive exFAT so both iOS and macOS can write.
Workflow
Plug SSD into phone (adapter may need separate power).
Open Files → Browse → long-press video → Move → SSD.
Progress bar appears top-right. Don’t lock screen.
Eject via ellipsis (…) menu → Eject to flush cache.
Plug SSD into Mac → copy off at up-to NVMe speed.
Benchmark
| Setup | File Size | Write to SSD | Read to Mac |
|---|---|---|---|
| iPhone 15 Pro USB-C → Samsung T9 | 37 GB | 48 s | 42 s |
| iPhone 13 Lightning → T7 w/ Camera Kit | 37 GB | 18 min (USB 2) | 42 s |
Even on Lightning the SSD trick halves total time vs. AirDrop and avoids random Wi-Fi drop-offs.
Method #4 – iCloud Drive (Let the Clouds Do the Walking)
Sometimes your MacBook is miles away, and cables are nowhere. iCloud Drive becomes the fallback.
Set-Up
Settings → Apple ID → iCloud → iCloud Drive ON.
In Files app, long-press clip → Move → iCloud Drive folder.
Mac Finder → iCloud Drive; watch it drizzle down.
Bandwidth Reality Check
1 GB ≈ 8 Gb. Over a 25 Mbps upload it takes 4.3 min per GB. A 30 GB movie = 2 h 10 m. If you’re on a capped mobile hotspot, rip your data wallet.
Cost math
iCloud free: 5 GB (lol)
50 GB tier: $0.99/month – enough for a single monster file at a time.
Remember to delete from cloud AND “Recently Deleted” to reclaim quota.
Method #5 – Third-Party Wi-Fi Transfer Apps (Cables? We Don’t Know Her)
A. Documents by Readdle
In app → Connections → Computer.
It shows
http://192.168.1.25URL.On Mac browser paste link → drag files from web UI.
Transfer uses pure LAN at your router’s max speed (Wi-Fi 6 up to 900 Mbps).
B. FE File Explorer Pro
This power-user app mounts SMB and SFTP shares.
Mac System Settings → Sharing → File Sharing ON.
Add a “VideosFromiPhone” folder.
FE App → Add Location → SMB → enter IP + Mac username/pw.
Copy/paste your 50 GB folder.
Security tip: Disable Guest; use a throwaway local account with strong password.
Method #6 – Mac SMB/SFTP Network Share (DIY Mini-Server)
When you shoot multi-cam events (weddings, conferences), cables per phone are messy. Create a shared Mac folder all shooters dump into.
Setup
Ethernet the Mac to router (1 Gb or 2.5 Gb).
System Settings → Sharing → File Sharing → Options: check SMB & user.
Each iPhone Files app → Connect to Server →
smb://Mac-IP.Copy large files; speeds peak ~115 MB/s on gig-ether.
Advanced
Enable AFP too if you have vintage macOS devices.
Jumbo frames (MTU 9000) add ~5 % throughput on certain switches.
Method #7 – Photos-App Cable Import (Grandpa’s Mac Still Works)
If you’re on Mojave or earlier:
Photos app → Import tab.
Disable “Copy items to Photos Library” if your SSD is puny; use Referenced setup.
Under Preferences → General uncheck “Automatic HEVC→H.264” to keep HDR10.
Imports at Lightning USB 2 speeds (30 MB/s) but beats AirDrop’s random resets.
Method #8 – QuickTime “New Movie Recording” (Live Capture)
Sometimes space on iPhone is gone, but the battery is full.
Cable iPhone to Mac.
QuickTime Player → File → New Movie Recording.
Next to record button, pick iPhone as camera and mic.
Record; video lands directly on your Mac drive in H.264.
Perfect for hour-long seminars where file size would exceed iPhone storage anyway.
Method #9 – Peer-to-Peer Thunderbolt Networking (For Nerds in a Hurry)
40 Gb Thunderbolt 4 math:
Theoretical top: 5 GB/s.
Real NVMe write: 2.8 GB/s.
iPhone USB-C controller peaks 1 GB/s.
Still insane.
How
USB-C (TB4) cable from iPhone 15 Pro Max to MacBook Pro M3.
macOS auto-creates Thunderbolt Bridge interface.
On iPhone run FE File Explorer Pro → enable FTP server (port 2121).
On Mac
ftp 169.254.20.2 2121→get bigfile.mov.
Sustained 900 MB/s means 100 GB in under 2 minutes—faster than writing it to most external SSDs.
Method #10 – Hybrid Cloud Free-Tier Stacking
Your buddy in another country needs the raw file, and neither of you wants to pay.
On Mac, install Keka. Choose Split Zip → 4 GB pieces.
Upload zips: first 15 GB to Google Drive, next 20 GB to MEGA (grab limited-time 35 GB promo), leftovers to pCloud (10 GB on referrals).
Send public links; friend downloads & Terminal:
Hacky? Yes. Free? Also yes.
Last-Resort Lossless Compression
HandBrake Passthru
Source -> Output Container MP4
Video Codec: Passthru
Audio: Passthru
Subtitles: None
File shrinks 2–5 % by stripping container overhead—not magic but can drop under Google Drive 15 GB cap.
QuickTime “Export As Original”
Imports to Mac Photos then File → Export → Unmodified Original retains ProRes metadata but removes sidecar edits, shaving ~1 % overhead.
Power, Heat & Battery – Unsexy but Crucial
Keep charger plugged even when copying over USB 3. The port delivers max 9 W; copying large files draws extra.
Disable Auto-Lock: Settings → Display & Brightness → Auto-Lock → Never (remember to revert).
Cooling: iPhone on a metal stand, MacBook on a ventilated pad; each 1 °C drop reduces throttling and keeps USB link alive.
Always Back Up the Originals (3-2-1)
3 copies – iPhone, Mac SSD, external drive.
2 media types – NVMe + spinning HDD or cloud.
1 off-site – Backblaze B2 at $0.005/GB-month (100 GB = $0.50).
Verify with
shasum -a 256 file.movon both copies to catch silent corruption.
Workflow Templates
TikTok Creator
Shoot 1080 p/60 (files < 600 MB).
Cable to Mac with Finder drag; edit in Final Cut; export vertical slab.
Wedding Videographer
Multi-cam ProRes LT.
Each shooter dumps to shared SMB folder over 5 GHz router at reception hall; editor starts syncing while party’s still rolling.
Travel Vlogger
Hotel Wi-Fi unreliable.
Nightly dump to 2 TB SSD; MacBook edits proxy; full-res archived to HDD at home.
Corporate Trainer
QuickTime New Movie Recording for 90-min screen capture + face cam.
Zero copy steps because it saves straight to Mac.
Troubleshooting Cheat-Sheet
| Symptom | Quick Fix |
|---|---|
| Finder: “Can’t read device.” | Re-trust pop-up; reset Location & Privacy in Settings → General → Transfer/Reset. |
| iPhone disconnects mid-copy | Swap cable; toggle airplane mode on then off; reboot Mac’s USB controller (sudo pkill -9 -f appleusbhost). |
| Duplicate file names | In Files app rename with timestamp before exporting. |
| Corrupted MOV (won’t open) | Use VLC → Media → Convert/Save to rebuild index; or run ffmpeg -i in.mov -c copy out.mov. |
Conclusion – Speed, Cost, Convenience—Pick Any Two
AirDrop is the communal bicycle: handy for neighborhood trips, useless for cross-country cargo. For mission-critical footage, cables plus Image Capture or Finder win on reliability and raw speed. When you’re cable-less, iCloud Drive or Documents by Readdle keep you moving—just budget the bandwidth. Want superhero speeds? Pair USB-C iPhones with NVMe SSDs or go full nerd with Thunderbolt IP. Whatever path you choose, follow the 3-2-1 backup mantra and you’ll sleep soundly knowing your cinematic masterpiece won’t vanish in a puff of radio-wave errors.
FAQs
1. Why does AirDrop stall on files larger than ~30 GB?
AirDrop rides Wi-Fi Direct plus Bluetooth handshakes. With ProRes, a single bit flip forces a restart. Bigger files = more packets = higher failure odds.
2. Can Lightning iPhones ever hit USB 3 speeds?
No. Lightning’s hardware caps out at USB 2 (~30 MB/s). Only the iPad Pro 12.9″ (2015) had a weird USB 3 Lightning; every other Lightning device is USB 2.
3. Do external SSDs suck battery faster?
Yes—an NVMe SSD can draw 2–3 W. Expect ~8 % battery drop per 20 GB copy. Keep the phone on a 20 W charger during big moves.
4. Will iCloud Drive compress my Dolby Vision or ProRes video?
No. iCloud Drive syncs a bit-perfect file. Beware iCloud Photos with Optimize Storage: it keeps the original in cloud and a 1080 p proxy locally.
5. What’s the cheapest upgrade for lightning-fast transfers?
Buy a USB-C NVMe SSD (≈ $80 for 1 TB) and Apple’s certified 10 Gbps cable. Even older Lightning phones copy to SSD faster than AirDrop, and USB-C iPhones absolutely fly.
That’s it—no more “Waiting…” wheels, no more midnight freak-outs. Pick your method, plug in (or don’t), and move those monster videos like a boss.